

Water damage can hit your home fast, and knowing how to handle it makes all the difference. From burst pipes to flooding, the steps you take in the first few hours can save you thousands in repairs. This guide walks you through the full process from finding the water source to getting your property back to normal. A trusted water damage restoration in Tampa, FL, team can help, but understanding the basics yourself puts you ahead. Below, we break down each stage so you know exactly what to expect.
Assessing the Water Damage
Before anything else, you need to figure out how bad the damage actually is. Walk through the affected areas and look for obvious signs, such as water stains, warped floors, or mold forming. Moisture meters help detect water hiding in walls and ceilings that you can’t see. Once you know what you’re dealing with, you can put together a game plan that fits your specific situation. A proper assessment sets the stage for everything that comes next.
Stopping the Source of Water
Nothing else matters if water keeps pouring in. If the problem is a burst pipe or a leaking appliance, shut off your main water supply right away. Check common trouble spots like basements, attics, and crawl spaces for leaks. Look for wet spots, stains, or dampness on walls and ceilings. Seal any cracks in your foundation and gaps around windows or doors that might let water in. The faster you cut off the source, the less damage you’ll have to deal with later.
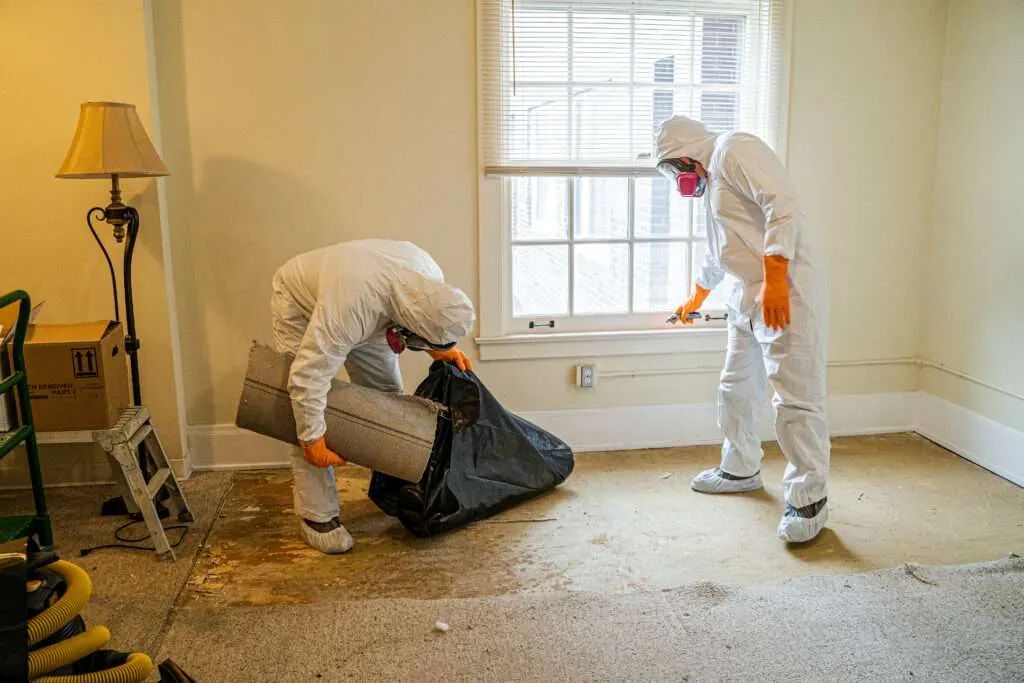
Removing Standing Water
Standing water is your enemy. The longer it sits, the more damage it causes, and mold can start growing within 24 to 48 hours. Use pumps and wet vacuums to remove the water as quickly as possible. If the water is contaminated (like from sewage or flooding), wear protective gear to stay safe. Start from the farthest corner of the room and work toward the exit for the most thorough removal. Speed matters here, so don’t wait.
Drying Out the Affected Areas
Getting everything completely dry is the only way to stop mold from taking over. Follow these steps to dry out the space properly:
- Maximize Air Circulation: Open windows and set up fans to keep air moving through the area.
- Use Dehumidifiers: Run dehumidifiers to remove excess moisture from the air and speed up drying.
- Toss Damaged Materials: Get rid of anything that can’t be saved, holding onto soaked items just invites mold.
- Monitor Progress: Use a moisture meter to check levels regularly and adjust your approach as needed.
Cleaning and Disinfecting
Once everything is dry, it’s time to clean and disinfect. Water damage can leave behind bacteria that pose health risks. Start by clearing out debris and anything beyond saving. Scrub all surfaces with detergent and water, paying extra attention to underwater areas. After cleaning, disinfect with a bleach-water solution or a store-bought disinfectant. Wear gloves and a mask while you work. Let everything air out completely before moving on to repairs.
Restoring and Repairing Damaged Property
With the space clean and dry, you can start putting things back together. Here’s how restoration typically breaks down:
- Assessment: Take stock of what needs fixing and prioritize the most urgent repairs.
- Structural Repairs: Repair any damage to foundations, walls, or support beams to ensure the building is safe.
- Moisture Removal: Double-check that all moisture is gone before closing up walls or laying new flooring.
- Restoration Work: Replace damaged materials and restore everything to its original condition.
Related Topics: